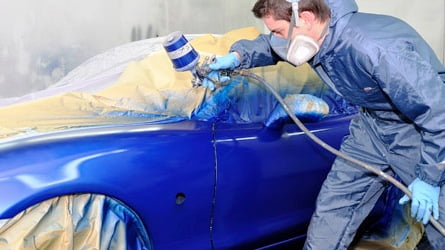
Nothing makes a car look older or more dilapidated than peeling paintwork and a lashing of rust. No amount of washing, waxing, or polish can hide such a finish, and driving around in a rundown old banger isn’t good for anyone’s self-esteem.
However, paying for a professional paint job is costly. Irrespective of whether your car needs a whole body overhaul or just a few scratches covering up, garages know how to charge, and although you might find yourself with a gleaming car at the end, you’ll also find yourself with empty pockets.
Luckily for you, spray painting provides an easy solution. Simple enough to carry out at home, it can help you to spruce up your motor without emptying your bank account. Here’s how to do it in five nice, uncomplicated steps:
Step 1: Get Set Up
When spray painting your car, the first thing that you need to do is to stock up on a few essentials. An air compressor, abrasive papers, cellulose thinners, masking tape, and newspaper should all be on your list, along with primer, car spray paint, and lacquer. Once you have these, find a well-ventilated garage or dry outside area and you’re ready to go.
Step 2: Prepare Your Vehicle
The next step is to prepare your vehicle for spraying. To do this, you’re going to need to take your abrasive paper and use this to rub the surface down to bare metal. Once complete, remove any traces of dirt or wax with your cellulose thinners. Any areas that are not going to be painted will need to be marked out with masking tape and newspaper, so that you don’t end up with colour where you don’t want it to be.
-Advertisement-
Step 3: Apply Primer
Step number three is simple: you need to hold the can of spray paint around 25cm from the area that you wish to paint, and apply two to three coats of primer at 15-minute intervals until the whole area has an even coverage. Once you are happy with the result, allow 24 hours for the primer to fully dry, before using abrasive paper to smooth the area. Finally, use warm, soapy water to clean the area, rinse, and dry.
Step 4: Apply Paint
Once you’re happy with the effect of your primer, it’s time to move onto painting. Before doing so, you’ll need to shake the can for around two minutes, as this will help to ensure that the substance is properly mixed. Multiple coats should be applied at 15-minute intervals, until the desired result has been achieved.
Step 5: Apply Lacquer
The final step to spray painting your car is short and simple. All that you’ll need to do to finish the effect is to apply a couple of coats of lacquer, with fifteen minutes between the two applications.
Voila! A new and shining motor that looks like it’s just rolled out of the showroom.
In case you got spray paint on the wheels, don’t panic. There are many ways you can remove the paint. Some of them includes spraying the affected area with Goof Off, wiping off the paint with rags, or using a toothbrush to get into small spaces.
Gallery


You’re doing a great job Man, Keep it up.